|
|
Growing
Your Own Snow Crystals
... Snowflakes in a bottle ... |
|
| It is simple, inexpensive, and fun to
grow your own snow crystals, using little more than some dry ice, a plastic Coke bottle,
and some styrofoam cups. This page describes how to set up this experiment, and what
you can expect to see. |
| The
Apparatus |
 The parts list for this experiment is as follows: The parts list for this experiment is as follows:
>One used 20-oz plastic Coke
bottle
>Three large-diameter styrofoam
cups
(or something similar; see below)
>A small kitchen sponge (1/2
inch thick)
>A short length of nylon fishing
line
(thinner is better; 1-pound test is good)
>A strong sewing needle
>Four straight pins
>One paper clip
>Some paper towels
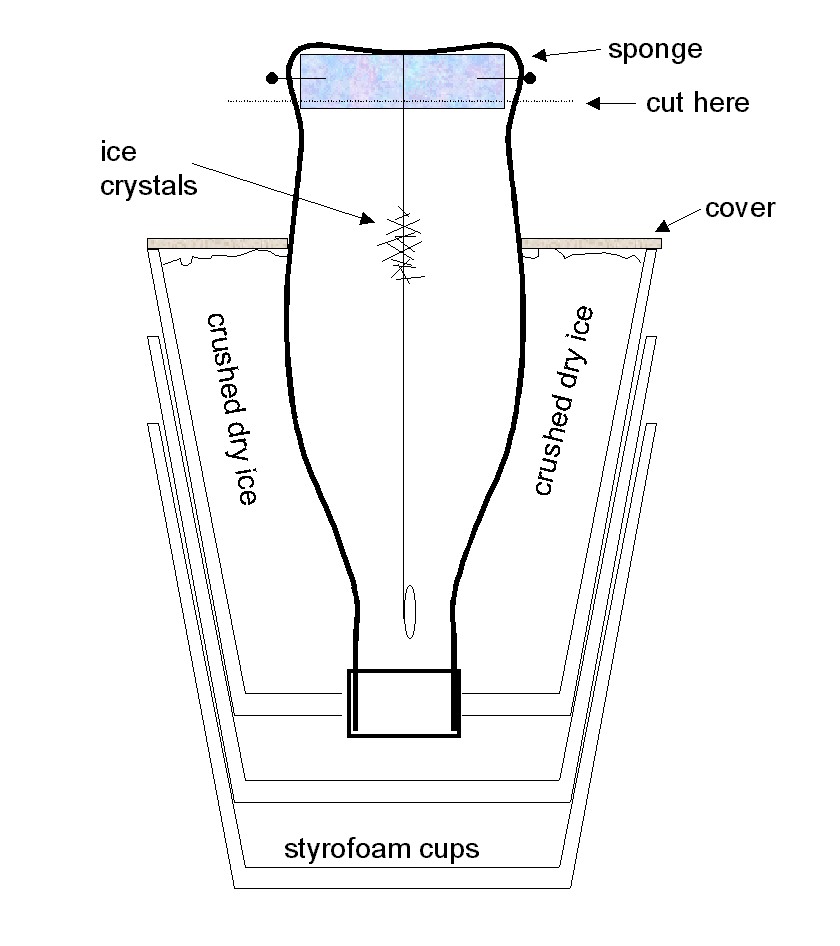
Step 1. After rinsing out the Coke bottle, use a
sharp knife to cut the bottle in two, about 1/2 inch above the bottom, as shown in the
figure. Poke a hole in the center of the bottle bottom using a
knife or needle, and
also poke four holes in the side of the bottle bottom. Make a small round sponge to
fit inside the bottle bottom, and hold the sponge in place by putting the four straight
pins into the side holes you made (see figure).
Step 2. Thread the fishing line into the sewing
needle, and push the needle through the hole in the bottle bottom, and through the sponge.
Attach the fishing line to the bottle bottom with a piece of tape, and tie a knot
in the other end to hold the paper clip. When the Coke bottle is inverted and
reassembled, the string should swing freely inside the bottle, as shown in the figure.
Step 3. Place the inverted Coke bottle inside the
three styrofoam cups, as shown, so that the bottom of the Coke label is at the same height
as the top of the cups (see figure). There should be about one inch of clear space
between the sides of the Coke bottle and the top edge of the styrofoam cups. |
Styrofoam Substitutions.
I used 32-ounce styrofoam cup-like containers for this experiment, which are wide and not
very tall. These cups are five inches tall and have a rim diameter of five inches,
which is just about right to provide clearance around the Coke bottle (which has a
diameter of 2.5 inches), and. To get the height right I cut a small hole in the
bottom of the innermost cup. If you can't find these exact containers, there are
lots of alternatives. The only real requirement is a styrofoam bucket of about the
right size. In a pinch you can make a bucket out of chunks of styrofoam, which is
often used as packing material. Cut pieces to make an open-topped box, and glue them
together using silicone glue (available at hardware stores -- it holds well when wet and
cold).
Your snow crystal growth chamber, which should now look
like that shown in the figure, is now ready to grow some snow crystals.
|
| A
Source of Cold |
To cool down our
apparatus we will use crushed dry ice, with is the only part of the experiment that is not
readily available. Dry ice is sold in all kinds of odd places, and I found several
sources in Pasadena by simply looking in the Pasadena Yellow Pages under Dry Ice.
For a single experiment you will need about 10 pounds of dry ice, although for running
many experiments at once it's probably sufficient to have a few pounds per
experiment. The price of dry ice ranges from $0.50 to $1.00 per pound.
Keep in mind that dry ice is very cold (about -60C), so you'll want to wear
gloves when handling it. Other than being cold, it's perfectly safe, as is consists
of nothing more than solid carbon dioxide. It doesn't melt, but rather sublimes
(changes from a solid to a gas when warmed), producing carbon dioxide gas in the process. |
Step 4. Pull the top off the
chamber (the bottle bottom + sponge), wet the sponge with tap water, and replace. |
Step 5. Put the dry ice inside
two plastic grocery bags, and pound on it with a hammer (or other blunt object) to crush
the dry ice. This works best on a hard surface, like concrete or asphalt. Dry
ice is much softer than water ice, and it crushes very easily. Put the crushed dry
ice back into its styrofoam cooler, and use a spoon to transfer some into the styrofoam
cups around your chamber (see the figure). Fill the cups to the top, and cover with
a piece of cardboard cut to shape, or with some paper towel strips. It's also a
good idea to wrap some paper towels around the top of the styrofoam cups, to keep them
from "sweating."
Be sure to add as much dry ice as you can to the cups, and add more dry ice
every so often. If the experiment doesn't work, it's probably because the dry ice
level is too low. |
Step 6. Observe! Small ice
crystals should begin forming on the string after 5-10 minutes, and after
an hour you
should have a pretty good bunch of crystals. A magnifying glass is useful, but not
essential for crystal viewing. When things get crowded, you can pull the top off the
chamber, wipe the string clear with your fingers, and try again. You should also
knock the crystals off the walls of the chamber -- swinging the paper clip around
accomplishes this nicely. One charge of dry ice will last about six hours, and more
can be added as needed.
|
| What
you will see |
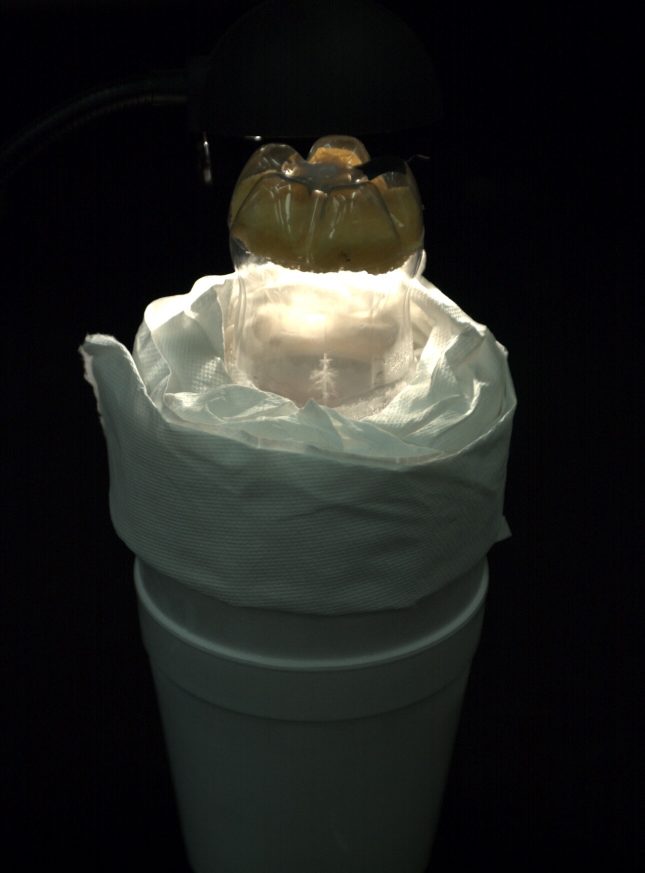
Here are some images of what you can
expect:
 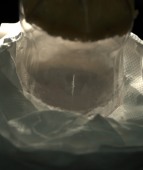 
The first image shows the whole apparatus, which is lit from behind to
give it a nice glow. The second image shows a growth of ice crystals four minutes
after the string was inserted into the chamber. The third shows the same collection
of crystals seven minutes later. |
| Fishbones and Dendrites.
If you look closely, you can observe both needle-like and
plate-like growth in your growth chamber. The easiest forms to identify are the
dendrites that form at -15C, especially if you let the crystals grow to a large size.
Above those will be the fishbones, which are a type of needle growth that grows at
-5C. |
 Dendrites. The schematic
diagram on the left shows what a -15C dendrite should look like. It has a
distinctive fern-like character, and the angles between the branches and the stem are
nearly exactly 60 degrees. The hexagonal plate in the sketch shows you the crystal
orientation (see the Primer).
More information about this growth form can be found at Snowflake
Branching. Dendrites. The schematic
diagram on the left shows what a -15C dendrite should look like. It has a
distinctive fern-like character, and the angles between the branches and the stem are
nearly exactly 60 degrees. The hexagonal plate in the sketch shows you the crystal
orientation (see the Primer).
More information about this growth form can be found at Snowflake
Branching. |
 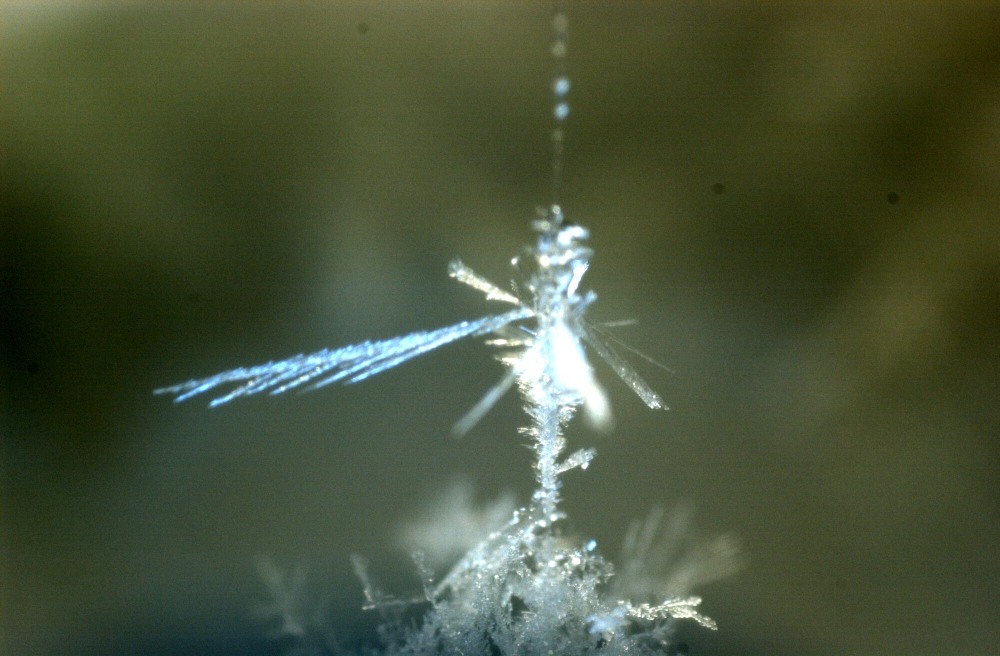 Fishbones. The -5C
fishbones are harder to recognize, since they don't exhibit the nice 60-degree angles like
the dendrites. The crystals have a feather-like appearance, and each of the
individual branches is a needle-like crystal growing along the a-axis (see the Primer).
The photo shows a particularly good fishbone example grown in a Coke-bottle growth
chamber. Fishbones. The -5C
fishbones are harder to recognize, since they don't exhibit the nice 60-degree angles like
the dendrites. The crystals have a feather-like appearance, and each of the
individual branches is a needle-like crystal growing along the a-axis (see the Primer).
The photo shows a particularly good fishbone example grown in a Coke-bottle growth
chamber.
|
| Science
Lessons |
| What you see in your snow crystal growth
chamber demonstrates a lot of physics. In a nutshell, water evaporates from the wet
sponge and diffuses through the air in the bottle. When the water vapor mixes with
the cold air in the lower part of the bottle, the air becomes supersaturated, meaning that
the water vapor will condense as ice onto any convenient object. Thus ice crystals
will form on the string and on the walls of the bottle. This apparatus, warm on top
and cool on the bottom, is called a diffusion chamber. Now let's look at it
in more detail. |
| Saturated air. If I take a
container, add a bit of water, and close the top, then the air in the container soon
becomes saturated with water vapor. Saturated air has a relative humidity
of 100 percent. Saturated air is the equilibrium state whenever there's lots of
water around. Thus when it's raining, or foggy, the humidity of the air outside is
close to 100 percent. |
Supersaturated air. In the
growth chamber we create supersaturated air, which has a relative humidity of
over 100 percent (in fact it's around 200 percent). In physics we call this a
non-equilibrium state, or a metastable state. Left to itself, a box of
supersaturated air will not stay supersaturated, since water or ice will condense onto the
walls of the box, and the humidity will drop to 100 percent (the equilibrium or stable
state). Supersaturated air is made all the time in the atmosphere (typically when
warm moist air mixes with cooler air), and is responsible for rain and snow.
Supersaturated air condenses into water droplets if the temperature is above
0C, and condenses to ice crystals (snow) if the air temperature is below 0C. Note
that snow crystals are not just frozen water droplets. Rather they are
crystals that grow in supersaturated air that is below freezing. |
Nucleation. Interestingly
enough, supersaturated air doesn't automatically condense to produce droplets of rain (or
snow). This only happens when there is some nucleation site on which
condensation can occur. (This is why we call supersaturated air a metastable
state -- it's not stable, but it can hang around for quite a while.)
The reason for this is that very tiny droplets of water (or ice), just a few
hundred molecules or so, have a higher vapor pressure than bulk water (or ice). The
molecules in such small droplets aren't bound very strongly, which means they come off
easily, which is the same as saying they have a higher vapor pressure. If such small
droplets form in supersaturated air, they don't grow, but rather just evaporate away.
If a large droplet forms, it will grow -- but large droplets can't just appear
spontaneously out of thin air.
In our growth chamber we provide a string to nucleate ice crystal growth.
On a microscopic scale there are scratches and other imperfections on the string,
and even individual water molecules can bind to these imperfections. Once we get a
small ice crystal started, it will continue growing.
In the atmosphere there are lots of dust particles, and these make dandy
nucleation sites. Rain droplets and snow crystals usually each contain a dust
particle, on which the growth got started. |
Diffusion. In our growth
chamber the top is warm and the bottom is cool. Since warm air is lighter than cool
air, the air in the chamber doesn't undergo convection. The air at the top of the
chamber becomes saturated with water vapor because it is right next to the moist
sponge. At this point the humidity is 100 percent. Diffusion happens because
the air and water molecules are all moving and colliding with one another, which mixes
things up on a microscopic scale. If you open a bottle of perfume in a still room,
or put a drop of food coloring in a still glass of water, it is also diffusion that does
the mixing.
In our growth chamber, diffusion causes the water molecules to diffuse down
from the top. As they diffuse down, they mix into a region where the air temperature
is much lower. This is like taking saturated air and cooling it down, with the
result that the air becomes supersaturated, so ice crystals can form. |
Faceted crystal growth. Why do
ice crystals form facets? This is because of the molecular structure of the ice
crystal. If we take an ice crystal and cut it in some random direction, the
resulting surface will typically be quite rough on a molecular scale, and the
molecule-sized kinks will be very attractive to water molecules in the vapor. Thus
the ragged surface will grow fast in supersaturated air. If we cut the crystal along
a special plane, however, one of the crystal facets, then the resulting surface will be
very smooth, without any molecule-size kinks. Molecules in the vapor phase don't
stick well to such a smooth surface, so it tends to grow much more slowly than a ragged
surface.
 So
now consider starting with a spherical ice droplet. Wherever the surface is ragged,
the crystal will grow rapidly, but along the facets the crystal will grow slowly.
Thus the ragged surfaces fill in, leaving nothing but faceted surfaces. Thus we're
soon left with a slow-growing faceted crystal, as observed. So
now consider starting with a spherical ice droplet. Wherever the surface is ragged,
the crystal will grow rapidly, but along the facets the crystal will grow slowly.
Thus the ragged surfaces fill in, leaving nothing but faceted surfaces. Thus we're
soon left with a slow-growing faceted crystal, as observed.
|
 Phase
Diagrams. Why does water ice melt into a liquid, while dry ice turns into a
gas? The two materials are really not so dissimilar, as can be seen in their phase
diagrams at right. Both have solid, liquid, and gaseous phases, which occur at
different temperatures and pressures. However at a pressure of one atmosphere, which
happens to be where we live, dry ice can only exist in the solid or gaseous phases; liquid
CO2 only exists at higher pressures. Thus water ice is wet, and dry ice
is dry. Why the phase diagrams look like they do is of course a deeper question,
since it depends in detail on the interactions between molecules. Phase
Diagrams. Why does water ice melt into a liquid, while dry ice turns into a
gas? The two materials are really not so dissimilar, as can be seen in their phase
diagrams at right. Both have solid, liquid, and gaseous phases, which occur at
different temperatures and pressures. However at a pressure of one atmosphere, which
happens to be where we live, dry ice can only exist in the solid or gaseous phases; liquid
CO2 only exists at higher pressures. Thus water ice is wet, and dry ice
is dry. Why the phase diagrams look like they do is of course a deeper question,
since it depends in detail on the interactions between molecules. |
Comments? If
you tried this little experiment, please send me an
e-mail and tell me how it worked out.
Note: This page is best printed in Landscape (file: page setup:
landscape) |
|