Designer
Snowflakes - Part One
... First attempts ... |
|
While
studying the physics of how snow crystals form and grow, I also became interested in the
art of growing synthetic snowflakes. These are basically identical to what falls
from the sky, except they are made in the lab under controlled conditions. I also
like to call them designer snowflakes, since in principle one could design
whatever shape one wanted ... within the bounds of the crystal-growing physics, of course.
Why make designer snowflakes? Partly
it's the challenge of reproducing what's found in nature, and perhaps doing better than
nature. There's also a sound scientific motivation for making designer snowflakes,
since often the best way to understand a phenomenon is to try and reproduce it in the lab.
One might even learn something interesting about crystal growth along the way.
|
| The
Art of Growing Snowflakes |
 Start with a Diffusion Chamber Start with a Diffusion Chamber
There are many ways to grow snowflakes (see the Designer's Page),
but my favorite starts with something called a vapor diffusion chamber.
This is essentially nothing more than an insulated box that is kept cold on the bottom
(say -40C) and hot on the top (say +40C). A source of water is placed at the top,
and water vapor diffuses down through the box, producing supersaturated air. The
cold, supersatured air at the center of the chamber is ideal for growing ice crystals.
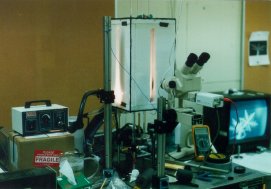
Our first diffusion chamber was the rather simple affair shown at right --
mostly made of plexiglas and styrofoam. I worked with Caltech undergraduate Victoria
Tanusheva to make our first designer snowflakes in this apparatus in the summer of
1997.
|
| Electric
Needles |
  While working with this diffusion chamber, we rediscovered a
wonderful technique for growing synthetic snow crystals that was first published in 1963
by meteorologist Basil Mason and collaborators [1]. One starts by putting a wire
into the diffusion chamber from below, so that small ice crystals begin growing on the
wire's tip. Then apply a high voltage to the wire, say +2000 volts, and voila
-- slender ice needles begin growing from the wire. While working with this diffusion chamber, we rediscovered a
wonderful technique for growing synthetic snow crystals that was first published in 1963
by meteorologist Basil Mason and collaborators [1]. One starts by putting a wire
into the diffusion chamber from below, so that small ice crystals begin growing on the
wire's tip. Then apply a high voltage to the wire, say +2000 volts, and voila
-- slender ice needles begin growing from the wire.
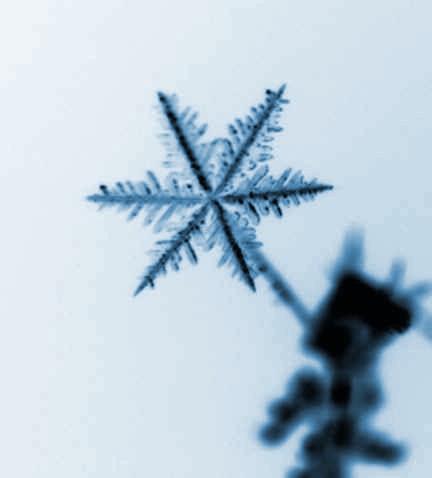
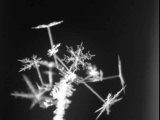
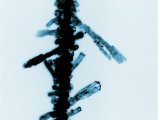
The great thing about electric needles is that you can grow snow stars on
their ends. The picture at right shows five electric needles growing out from our
initial ice-covered wire, and each needle is topped with a snow star. The right
image is a negative close-up of the same cluster of needles (from a different viewpoint);
the diameter of the snow star is 2.4 mm.
In addition to the pretty pictures, we also spent a fair bit of time puzzling
over exactly how the electric needles grow, which we showed was because of an electrically
induced growth instability [2]. |
| Snow
Stars |
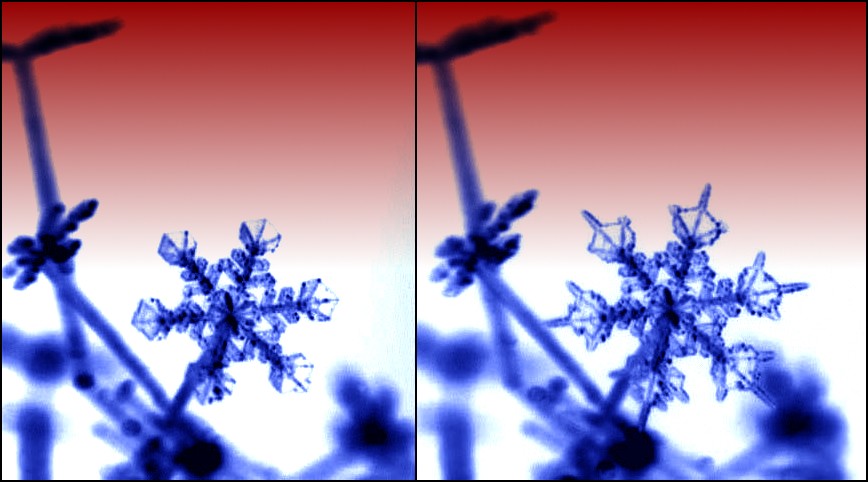
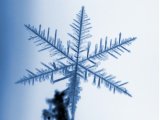
 These two pictures show a well-formed snow star
growing at the end of a long electric needle crystal. The left image is after about
10 minutes of growth, the right image about 5 minutes later. The diameter of the
star in the right-hand image is roughly 2.5 mm. The temperature of the crystal was
varied with time to change the crystal growth morphology, giving the crystal its unique
form. These two pictures show a well-formed snow star
growing at the end of a long electric needle crystal. The left image is after about
10 minutes of growth, the right image about 5 minutes later. The diameter of the
star in the right-hand image is roughly 2.5 mm. The temperature of the crystal was
varied with time to change the crystal growth morphology, giving the crystal its unique
form.
|
|
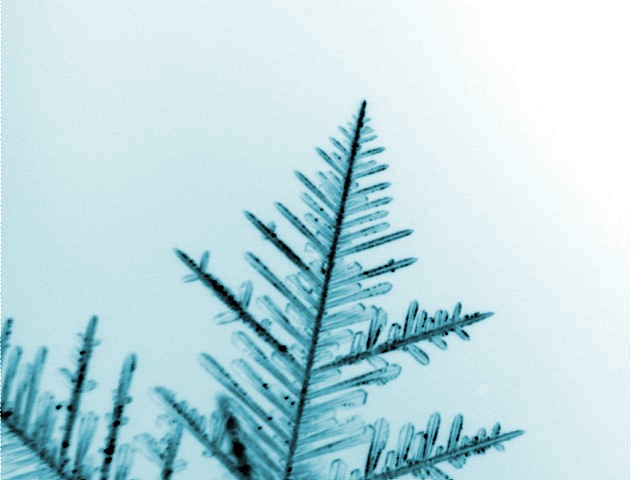
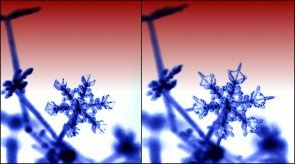
Here is another large dendritic star; the right-hand image shows the star after the
background crystals were carefully removed. |
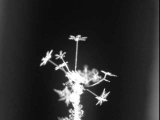 
Two shots of a cluster of numerous snow stars growing on electric needles. |
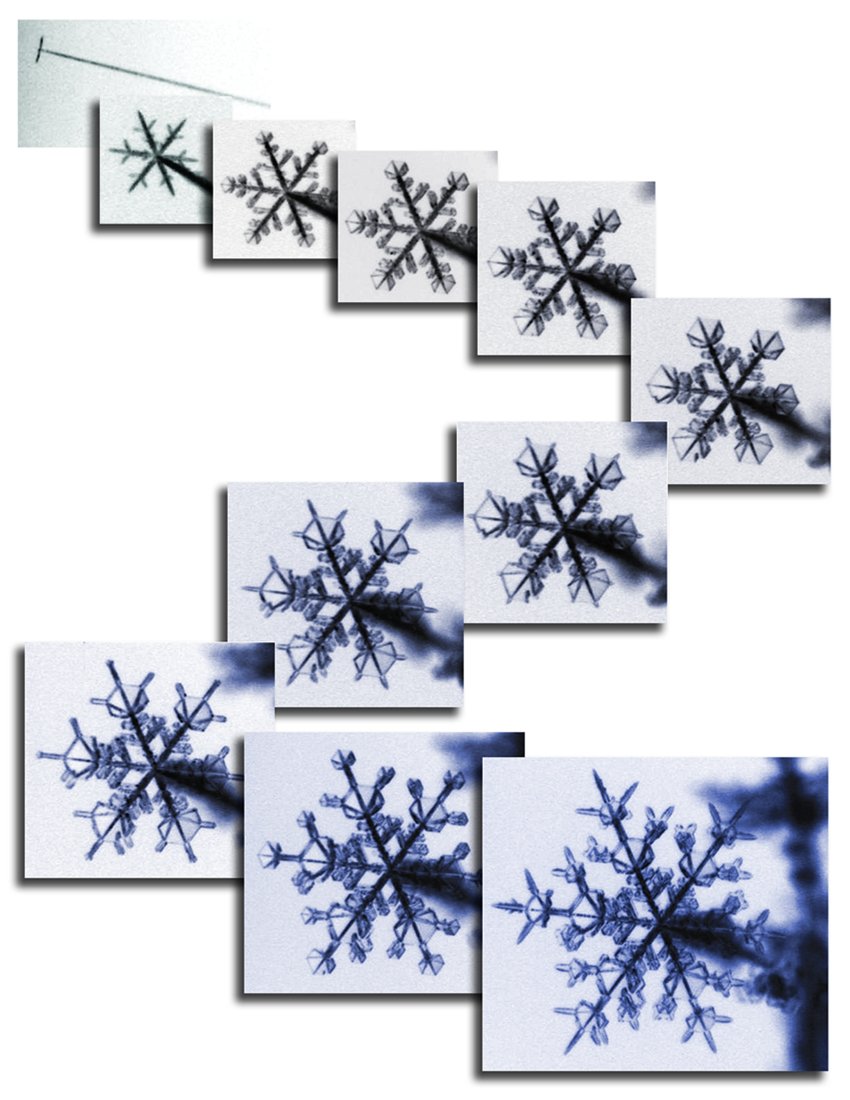
 Moviemaking Moviemaking
This time series of pictures shows the growth of a large star (final diameter
about 4.5 mm). First the wire was placed at a position in the chamber where the
temperature was -5C and an electric needle was grown (see Electric
Growth). Then the voltage was turned off and the needle moved to -15C, where a
stellar dendrite formed. Then the temperature was cycled between roughly -15 C,
which gave rapidly growing dendritic spikes, and -12 C, which produced more-slowly growing
sectored plates. Each of the sub-images is shown at the same scale.
See Snowflake Movies
for some movie clips of growing snowflakes. |
   |
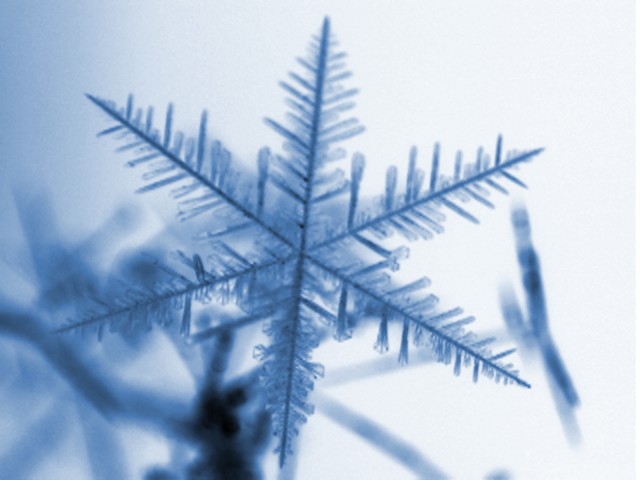
   Here are some random dendrites grown in our diffusion
chamber, which form at a temperature of around -15 C. Note the appearance of
sectored plates in some of the images, which results from lower supersaturations. Here are some random dendrites grown in our diffusion
chamber, which form at a temperature of around -15 C. Note the appearance of
sectored plates in some of the images, which results from lower supersaturations. |
|
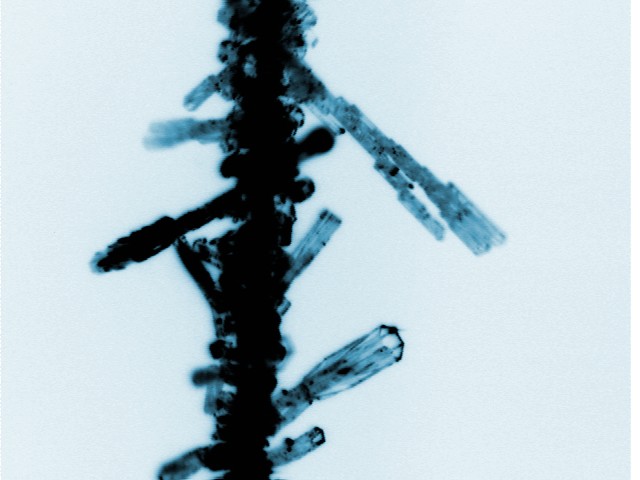
Some typical needle-like crystals which grow around -5C. |
| The
Hardware |
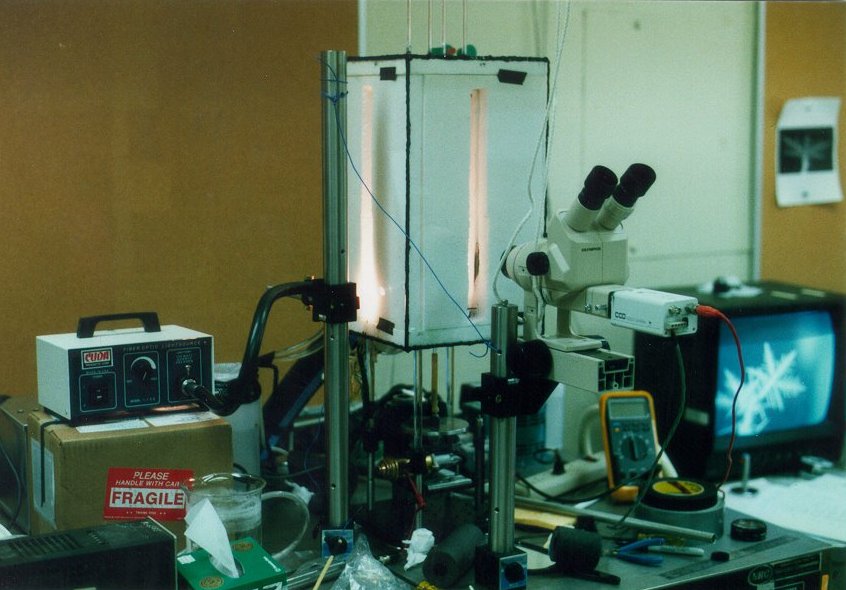
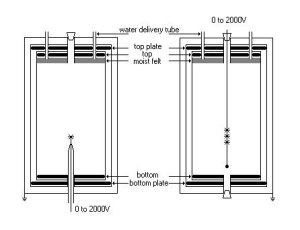 This shows a
schematic view of the vapor diffusion chamber. Dimensions of the inner box are
15x15x32 cm. The bottom plate was cooled to as low as -50 C while the top plate was
heated to as high as 40C. The temperature gradient created a stable environment
since warm air floats on top of cold air. Water vapor diffused downward to make
supersaturated air in the center of the chamber. This shows a
schematic view of the vapor diffusion chamber. Dimensions of the inner box are
15x15x32 cm. The bottom plate was cooled to as low as -50 C while the top plate was
heated to as high as 40C. The temperature gradient created a stable environment
since warm air floats on top of cold air. Water vapor diffused downward to make
supersaturated air in the center of the chamber.
Crystals were grown either on the tip of a tungsten wire (left) or along a
nylon string (right). The three layers of chamber walls were made from acrylic
sheet, with styrofoam insulation between layers. |
| Imaging was done from the side, using a
standard video camera attached to one eye of a stereo microscope. Images were
digitized using a Snappy frame grabber, with SnapCap software for time-lapse
imaging. (This was before the era of cheap digital cameras!) The images were
all digitized at a resolution of 640x480 pixel resolution, and typically have a scale of
10 microns/pixel. . |
 And finally we have a picture of Vicky Tanusheva at the helm. And finally we have a picture of Vicky Tanusheva at the helm. |
|
| [1] J. T. Bartlett, A. P. van den Heuval, B. J.
Mason, Z. angue. Math. Phys. 14, 509 (1963). [2] "Electrically Induced Morphological Instabilities in Free Dendrite
Growth," K. G. Libbrecht and V. M. Tanusheva, Phys. Rev. Lett. 81,
176 (1998). (see our published
papers) |